How to install the Analytics and database servers
To perform the procedures on this page, a candidate Analytics host must have internet access.
Host requirements
The Analytics host may be a real or virtual host with a minimum of 32GB RAM and 8 CPU cores, plus the storage shown in the following table.
| Mount point | Min. size | Purpose | Filesystem |
|---|---|---|---|
| / | 30GB | Root | XFS or EXT4 |
| /tmp | 10GB | Temporary space | EXT4 |
| /opt/zenoss_analytics | 50GB | Analytics software | EXT4 |
| /var/lib/mysql | 500GB | Database storage | EXT4 |
Note that each of the preceding filesystems must be mounted on independent partitions.
Additional requirements:
- This release was tested on CentOS 7.9 and RHEL 8.4. More recent versions of RHEL are supported as well.
- The
firewalldservice must be disabled. - User ID 1337 must be available. If
sudo getent passwd 1337returns a result, it is not available. - On RHEL systems, python (2 or 3) must be installed.
Verify the host
Use the verify-host script to determine whether a system can host Analytics and MariaDB.
The script performs read-only tests of a host's compute, memory, operating system, and storage resources.
You can run the script as many times as you wish without affecting the host.
-
Log in to the candidate host as root or as a user with superuser privileges.
-
Download the compressed
verify-hostscript.curl -O https://storage.googleapis.com/zenoss-doc-artifacts/an/verify-host.gz -
Decompress the script.
gunzip verify-host.gz -
Change the file mode.
chmod +x ./verify-host -
Run the script.
./verify-host
For more information about error messages from the script, see Error messages.
Networking requirements
For optimal performance, the Analytics host should be on the same subnet as the Control Center hosts assigned to the resource pool where Resource Manager services are deployed. Ideally, you will add the fully qualified domain name of the Analytics host to your DNS service.
The following table shows the TCP port requirements.
- Port 443, for SSL communication with Control Center hosts.
- Port 3306, for remote access to MariaDB (optional).
- Port 7070, for data transfers from the Analytics server.
Install OpenJDK
Analytics requires the OpenJDK package.
- For CentOS 7.9, the minimum version is OpenJDK 11.
- For RHEL 8.x, the minimum version is OpenJDK 17.
Perform these steps:
-
Log in to the candidate host as root or as a user with superuser privileges.
-
Remove all other installed Java packages, if any.
yum remove $(rpm -qa | grep -Ei '(jdk|jre|java)') 2> /dev/null -
Install OpenJDK.
yum install java-11-openjdkyum install java-17-openjdk -
Verify that the installation succeeded.
java -versionIf the command returns output similar to the following, continue to the next procedure.
openjdk version "11.0.19" 2023-04-18 LTS
OpenJDK Runtime Environment (Red_Hat-11.0.19.0.7-1.el7_9) (build 11.0.19+7-LTS)
OpenJDK 64-Bit Server VM (Red_Hat-11.0.19.0.7-1.el7_9) (build 11.0.19+7-LTS, mixed mode, sharing)
Install MariaDB
MariaDB 10.6 is the Analytics database server.
Amazon RDS not supported
Amazon RDS is known NOT to work, and is NOT supported. Specifically RDS does not support binary UDFs, which means that Nth-percentile aggregations will not work; there may be other issues that we are not aware of.
Perform these steps:
-
Log in to the Analytics host as root or as a user with superuser privileges.
-
Remove all other installed mySQL packages, if any.
yum remove $(rpm -qa | grep -i mysql-server) 2> /dev/null -
Create a custom MariaDB repository.
-
Open the Download MariaDB Server page.
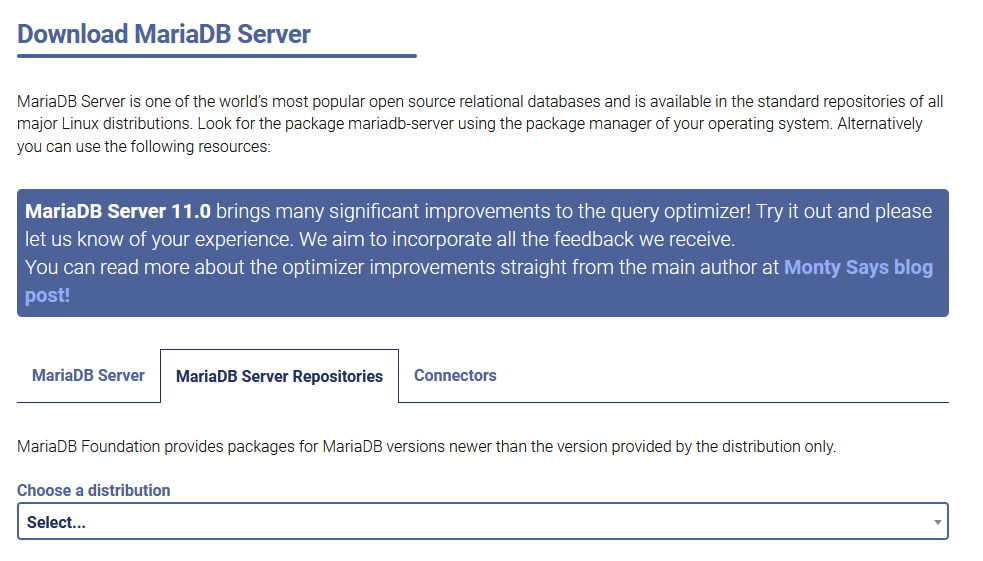
-
Use the form to create a custom repository specification.
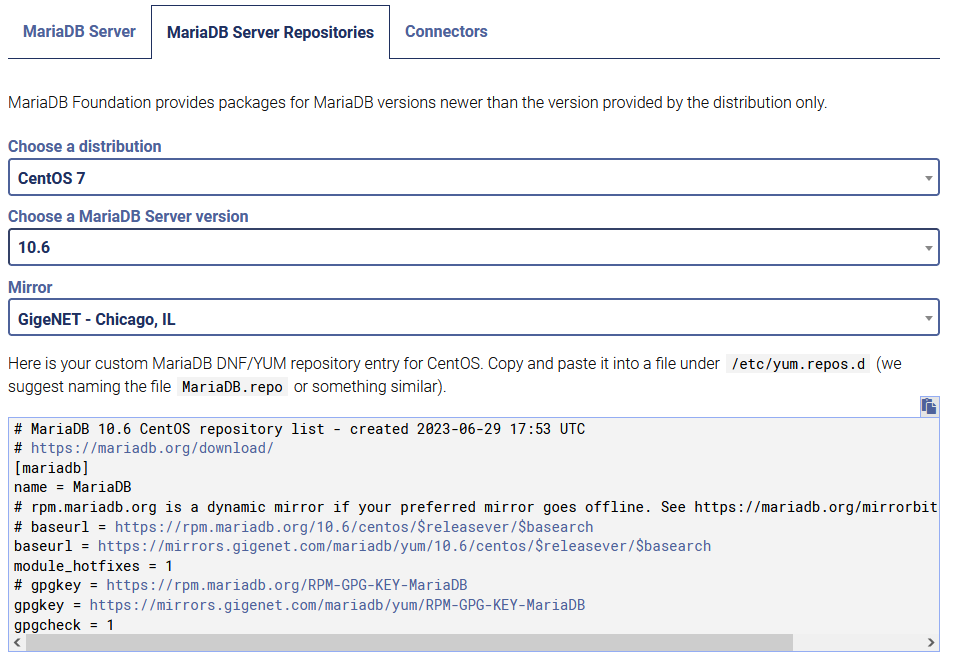
-
Create a file for the repository specification.
[[ -f /etc/yum.repos.d/MariaDB.repo ]] \ || touch /etc/yum.repos.d/MariaDB.repo -
Open the new file, copy the specification from the web site, and then paste the contents into the file.
# MariaDB 10.6 CentOS repository list - created 2023-06-29 13:23 UTC
# https://mariadb.org/download/
[mariadb]
name = MariaDB
# rpm.mariadb.org is a dynamic mirror if your preferred mirror goes offline.
# See https://mariadb.org/mirrorbits/ for details.
# baseurl = https://rpm.mariadb.org/10.6/centos/$releasever/$basearch
baseurl = https://mirrors.gigenet.com/mariadb/yum/10.6/centos/$releasever/$basearch
module_hotfixes = 1
# gpgkey = https://rpm.mariadb.org/RPM-GPG-KEY-MariaDB
gpgkey = https://mirrors.gigenet.com/mariadb/yum/RPM-GPG-KEY-MariaDB
gpgcheck = 1
-
Create a file for the repository specification.
[[ -f /etc/yum.repos.d/MariaDB.repo ]] \ || touch /etc/yum.repos.d/MariaDB.repo -
Open the new file, and then copy the following specification into the file.
[mariadb]
name = MariaDB
baseurl = https://rpm.mariadb.org/10.6/rhel/8/x86_64
module_hotfixes = 1
gpgkey = https://rpm.mariadb.org/RPM-GPG-KEY-MariaDB
gpgcheck = 1
-
-
Install MariaDB server.
yum install mariadb-serverNote: If you have not accepted the MariaDB GPG key, you will be prompted to do so.
-
Add a customized configuration file.
cat <<EOF > /etc/my.cnf
[mysqld]
table_open_cache=16K
table_definition_cache=16K
tmp_table_size=2G
max_heap_table_size=2G
join_buffer_size=512K
open_files_limit=200000
tmpdir=/tmp
wait_timeout=86400
innodb_buffer_pool_size=16G
innodb_log_file_size=1892M
innodb_log_buffer_size=128M
optimizer_search_depth=0
EOF
Note: The innodb settings should reflect your system requirements. Edit the file and change the value of
innodb_buffer_pool_sizeto 50% of the total memory on the host and set the value ofinnodb_log_file_sizeto 25% of the value ofinnodb_buffer_pool_size. -
Start the MariaDB server.
systemctl start mariadbTo confirm success, connect to the database server:
mysql -u rootIf MariaDB fails to start, most likely you have a setting in /etc/my.cnf misconfigured or environmental issues. Check /var/lib/mysql/<serverfqdn>.err for clues. Correct any issues before proceeding.
-
Set MariaDB to start on boot:
systemctl enable mariadb -
(Optional) To enable remote access to the database server (through port 3306), you can grant remote access to the
rootandreporting_readusers.mysql -u root grant all privileges on *.* to 'root'@'%' with grant option; grant all privileges on *.* to 'reporting'@'%' with grant option; flush privileges;
Install the Analytics server
This procedure installs the Analytics server.
-
Log in to delivery.zenoss.io and download the Analytics RPM packages for your operating system.
- zenoss-analytics-6.0.0-1.el7.x86_64.rpm
- zenoss-analytics-mysql-plugin-1.0.2-1.el7.x86_64.rpm
- zenoss-analytics-6.0.0-1.el8.x86_64.rpm
- zenoss-analytics-mysql-plugin-1.0.2-1.el8.x86_64.rpm
Copy the packages to your Analytics server host.
-
Log in to the server host as root or as a user with superuser privileges.
-
Install the Analytics server.
yum install zenoss-analytics-6.0.0-1.el[78].x86_64.rpm \ zenoss-analytics-mysql-plugin-1.0.2-1.el[78].x86_64.rpm -
Set up the MariaDB root user.
-
Set database privileges.
Replace
<ROOT-PASSWORD>with your password:mysql -u root grant all privileges on *.* to 'root'@'localhost' identified by '<ROOT-PASSWORD>' with grant option; -
Add the root password to the Analytics ETL configuration file.
Replace
<ROOT-PASSWORD>with your password:sed -ie 's/adminPassword=.*$/adminPassword=<ROOT-PASSWORD>/' \ /etc/zenoss_analytics/etl.conf
-
-
Run the plugin setup script as the
zenossuser.su - zenoss /opt/zenoss_analytics/bin/setup_zenoss_extensions installOn success, the script returns
Function 'percentile' is already installed. Proceed to step 7.On failure, perform the following substeps.
-
If you get a credentials error, re-run the script and provide the password for the MariaDB root user.
/opt/zenoss_analytics/bin/setup_zenoss_extensions -p installEnter root’s password when prompted.
- If the script succeeds, proceed to step 7.
- If the script fails, continue with the following substeps.
-
Restart MariaDB.
sudo systemctl restart mariadb -
Verify the plugin is working.
/opt/zenoss_analytics/bin/setup_zenoss_extensions checkIf you get a credentials error, re-run the script and provide the password for the MariaDB root user.
/opt/zenoss_analytics/bin/setup_zenoss_extensions -p checkEnter root’s password when prompted.
On success, the script returns a result similar to the following:
Function 'percentile' is already installed
-
-
Exit the
zenossshell.exit -
Update
systemd.systemctl daemon-reload -
Create the reporting database.
/opt/zenoss_analytics/bin/upgrade_db.pyTypically, errors reflect environmental issues. First, make sure localhost resolves to 127.0.0.1 and verify that /tmp does not have any leftover files from a previous installation attempt. Correct those issues and then rerun the preceding command.
-
Configure the Analytics server to start on boot.
systemctl enable zenoss-analytics -
Start the server and watch the log file.
systemctl start zenoss-analytics \
  && journalctl -flu zenoss-analytics -o cat
On initial startup, the data warehouse schema is adjusted and populated with configuration information appropriate to the current version of Analytics. This process usually takes about 5 minutes, during which the Analytics application is unavailable. Wait for the following message in the log and then continue with the next procedure.
INFO: Server successfully started in <time in ms>
Install SSL/TLS
Analytics uses Apache and mod_ssl to provide SSL/TLS for all
communications. This procedure is required to secure the
Analytics server.
This procedure installs Apache and mod_ssl and sets it to
use a self-signed SSL certificate. You can use a
certificate signed by a third-party Certificate Authority
or generate your own certificate.
-
Log in to the Analytics host as the root user or as a user with superuser privileges.
-
Install Apache and
mod_ssl.yum install httpd mod_sslTo verify success, open the HTTP and HTTPS addresses in a web browser. For example, for host name
example.com, openhttp://example.com/andhttps://example.com/. -
Configure Apache to start on boot and start it.
systemctl enable httpd && systemctl start httpd -
Configure Apache to proxy all requests to the Analytics server.
-
Change directory to the Apache configuration directory.
cd /etc/httpd/conf.d -
Create a backup of the module configuration file.
cp ssl.conf original_ssl.conf_original -
Open
ssl.confwith a text editor, and then search forSSLCert.Update the following directives with your certificate and key files.
SSLCertificateFile /etc/ssl/certs/SERVER.crt
SSLCertificateKeyFile /etc/ssl/private/SERVER.key
Note: If your files are not already in those directories, place copies there before proceeding.
-
If a CHAIN file is required, update the file with its location.
The CHAIN file is not required for a self signed certificate, or for a certificate signed directly by a private root CA, but should be the complete chain between the server certificate and the root certificate. The CHAIN file format is concatenated PEM.
SSLCertificateChainFile /etc/pki/tls/certs/CHAIN.crt -
Add the following content just before the
</VirtualHost>closing tag.## Internal proxy rules instructing Apache to proxy any request to the ## Analytics server and data warehouse on 7070 ProxyPass /etl http://127.0.0.1:7070/etl ProxyPassReverse /etl http://127.0.0.1:7070/etl -
Save
ssl.confand close the text editor.
-
-
(Optional) If SELinux is enabled, allow Apache to open a network port and accept connections.
/usr/sbin/setsebool -P httpd_can_network_connect 1 -
Restart Apache.
systemctl restart httpd -
Restrict access to the
tomcatserver to localhost only.-
Change directory to the Analytics server configuration directory.
cd /opt/zenoss_analytics/conf -
Create a backup of the
server.xmlfile.cp server.xml original_server.xml_original -
Open
server.xmlwith a text editor, and then search for7070.The location should be the following directive:
<Connector port="7070" protocol="HTTP/1.1" connectionTimeout="20000" redirectPort="8443"/> -
Add
address="127.0.0.1"to the first line, betweenportandprotocol.The result should look like the following example:
<Connector port="7070" address="127.0.0.1" protocol="HTTP/1.1" connectionTimeout="20000" redirectPort="8443"/> -
Save
server.xmland close the text editor.
-
-
Restart
tomcatby stopping and starting the Analytics service.systemctl stop zenoss-analytics && systemctl start zenoss-analytics