Editing a connection to configure static IPv4 addressing
The default configuration for network connections is DHCP. To configure static IPv4 addressing, perform this procedure.
To navigate in the text user interface (TUI):
- To move forward or backward through options, press the arrow keys.
- To display a menu or choose an option, press Enter.
Follow these steps:
- Gain access to the Control Center host, through the console interface of your hypervisor, or through a remote shell utility such as PuTTY.
-
Log in as the
rootuser.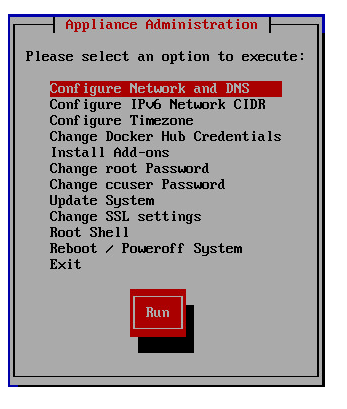
-
In the Appliance Administration menu, select Configure Network and DNS, and then press Enter This step starts the NetworkManager TUI.
-
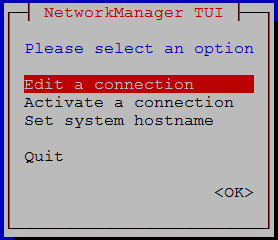
On the NetworkManager TUI menu, select Edit a connection, and then press Enter.
The TUI displays the connections that are available on the host.
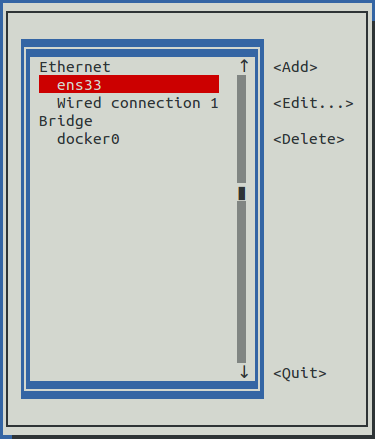
Note: Do not use this procedure to modify the
docker0connection. -
Select the virtual connection, and then press Enter.
-
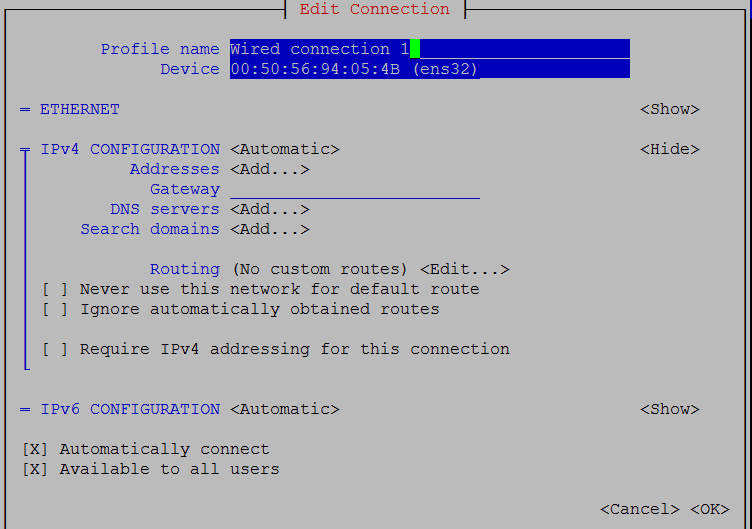
Optional: If the IPv4 CONFIGURATION area is not visible, select its display option (<Show>), and then press Enter.
-
In the IPv4 CONFIGURATION area, select <Automatic>, and then press Enter.

-
Configure static IPv4 networking as follows:
- Select Manual, and then press Enter.
- Beside Addresses, select <Add>, and then press Enter.
- In the Addresses field, enter an IPv4 address for the virtual machine, and then press Enter.
- Repeat the preceding two steps for the Gateway and DNS servers fields.
- Tab to the bottom of the Edit Connection screen to select OK, and then press Enter.
- On the NetworkManager TUI screen, select Quit, and then press Enter. This step returns control to the Appliance Administration menu.
- Reboot the operating system:
- In the Appliance Administration menu, select Reboot / Poweroff System.
- Select Reboot.
- Select OK, and then press Enter.