Creating a master host with Hyper-V
To perform this task, you need:
- Microsoft Remote Desktop Connection
- Administrator privileges on a Microsoft Hyper-V server
- Permission to download files from delivery.zenoss.io.
Use this procedure to install the Resource Manager master host appliance as a virtual machine managed by Microsoft Hyper-V.
-
Use a Microsoft Remote Desktop Connection to log in to a Hyper-V host as Administrator, or as a user with Administrator privileges.
-
In a web browser, navigate to delivery.zenoss.io, and then log in.
-
Download the Resource Manager master host ISO file. Replace
VERSIONwith the current release number (for example, 6.9.0).zenoss-zsd-VERSION-1-master.x86_64.iso -
Open Hyper-V Manager.
-
In the left navigation pane, choose a server to host the virtual machine.
-
From the Action menu, choose New > Virtual Machine.
The New Virtual Machine Wizard opens.
-
In the New Virtual Machine Wizard dialog, display the Specify Name and Location panel.
If the first panel displayed is the Before You Begin panel, click Next.
-
In the Specify Name and Location panel, provide a name for the virtual machine, and then click Next.
-
In the Specify Generation panel, choose Generation 1, and then click Next.
-
In the Assign Memory panel, specify the memory for the virtual machine.
-
In the Startup memory field, enter the amount of memory for the host.
- For multi-host deployments, enter
16384(16GB). - For single-host deployments, enter
32768(32GB).
- For multi-host deployments, enter
-
Optional: Check Use Dynamic Memory for this virtual machine.
Resource Manager is tested with dynamic memory enabled.
-
Click Next.
-
-
In the Configure Networking panel, choose a virtual switch, and then click Next.
-
In the Connect Virtual Hard Disk panel, specify a new disk on which to install the guest operating system.
-
Choose Create a virtual hard disk.
-
Specify a name.
-
In the Size field, enter
30. -
Click Next.
-
-
In the Installation Options panel, specify the master host ISO file.
-
Choose Install an operating system from a bootable CD/DVD-ROM.
-
Choose Image file (.iso).
-
Specify or browse to the location of the master host ISO file.
-
Click Next.
-
-
In the Completing the New Virtual Machine Wizard panel, verify the description, and then click Finish.
Hyper-V Manager creates the new virtual machine, and then closes the wizard.
Configuring and starting a Hyper-V master host
To perform this task, you need:
- A Microsoft Remote Desktop Connection
- Administrator privileges on a Microsoft Hyper-V server
- The master host created in the previous procedure
The Resource Manager master host virtual machine requires a total of 7 virtual hard disks. More information about required disks: Resource requirements for multi-host deployments.
Use this procedure to configure hardware resources, create disks 2-6, and start the master host.
-
Use a Microsoft Remote Desktop Connection to log in to a Hyper-V host as Administrator, or as a user with Administrator privileges.
-
Open Hyper-V Manager.
-
In the Hyper-V Manager Virtual Machines area, right-click the new virtual machine, and then choose Settings.
The Settings dialog displays.
-
In the Hardware area, locate the virtual hard disk created previously, and then determine whether it is attached to an IDE controller.
Hyper-V guest machines can only boot from an IDE drive.
-
In the Hardware area, choose Processor, and then change the number of processors assigned to the machine.
-
In Number of virtual processors, enter the value for your deployment.
- For single-host deployments, enter
8. - For multi-host deployments, enter
4.
- For single-host deployments, enter
-
Click Apply.
-
-
In the Hardware area on the left, choose SCSI Controller, and then create additional virtual hard disks.
Repeat the following substeps to create new disks in the following sizes:
Purpose Size Swap 16GB Temporary ( /tmp)16GB Docker data 50GB Control Center internal services data 50GB Application data 200GB Application data backups 400GB -
In the controller area on the right, choose Hard Drive, and then click Add.
-
In the Location field, choose an unused location number.
-
In the Media area, choose Virtual hard disk, and then click New.
-
Complete panels in the New Virtual Hard Disk Wizard as follows:
-
Choose Disk Format: Choose VHDX, and then click Next.
-
Choose Disk Type: Choose Dynamically expanding, and then click Next.
-
Specify Name and Location: Enter the disk name, and then click Next.
-
Configure Disk:
-
Choose Create a new blank virtual hard disk.
-
Size: Enter a disk size from the list at the beginning of this step.
-
Click Next.
-
-
Summary/New Virtual Hard Disk Wizard: Verify the description, and then click Finish.
-
-
At the bottom of the Settings window, click Apply.
When all of the disks are created, click OK.
-
-
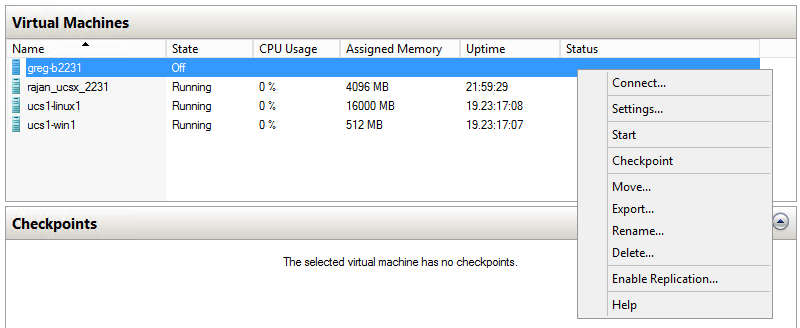
In the Hyper-V Manager Virtual Machines area, right-click the new virtual machine, and then choose Start.
-
In the Hyper-V Manager Virtual Machines area, right-click the new virtual machine, and then choose Connect.
-
In the Virtual Machine Connection window, press Enter.
The appliance installation process takes about 15 minutes, and should complete with no additional input.
If received, disregard the
Fast TSC calibration failuremessage.
Proceed to Configuring the Control Center master host.