Scanning a network
Network scan via the GUI
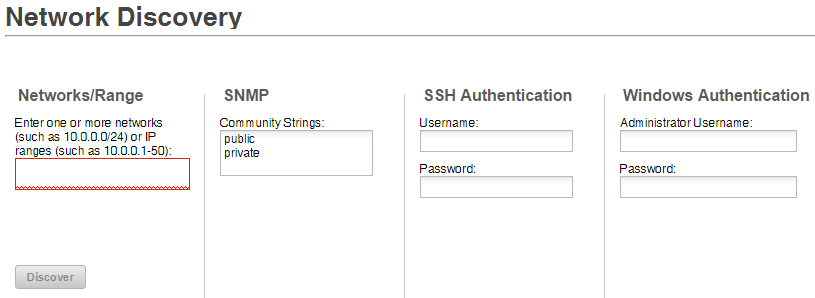
Provide network or IP address range information so that Resource Manager can discover your devices.
-
From the navigation menu, select INFRASTRUCTURE > Devices.
-
Click the Add Devices icon and, from the drop-down list, choose Discover Networks.
-
For each network or IP range in which you want the system to discover devices, enter an address or range. For example, enter a network address in CIDR notation 192.0.2.0/24 or a range of IP addresses 192.0.2.1-50. Note: Trying to add a /16 or /8 network can take a very long time, and might have unintended consequences.
-
For each network or IP range, specify the Windows, SSH, or SNMP credentials that you want Resource Manager to use on the devices that it discovers, and then click Discover. You can enter only one of each. Resource Manager attempts to use the same credentials on each device that it discovers in the specified networks or IP ranges. Resource Manager uses Advanced Encryption Standard (AES) with a 256-bit key size to encrypt all passwords, and stores them in the Zope object database.
Network scan via the CLI
To discover devices with the command-line interface, follow these steps:
-
Log in to the Control Center master host as root or as a user with superuser privileges.
-
Attach to the zenhub service as the zenoss user.
serviced service attach zenhub su - zenoss -
Run the zendisc command to discover devices.
zendisc run --now --monitor localhost --range networkOrIPRangeThe variable networkOrIPRange represents the network or IP range in which you want the system to discover devices. For example, enter a network address in CIDR notation 192.0.2.0/24 or a range of IP addresses 192.0.2.1-50.
Attempting to add a /16 or /8 network requires considerable time, and might have unintended consequences.