Activating the auto-generated rack view
First, ensure that the device is included in a location. Then follow these steps to make devices visible in Datacenter View.
- Select a device, from the list of Devices, click Details, and then click Edit.
- Enter values for Rack Slot. For more information about specifying values, see the next topic.
- Click Save.
The device appears in Datacenter View.
- In the List View, it appears as part of a rack illustration. The rack illustration becomes the default image in the List View.
- In the Custom View, it appears as a single device image.
Note: You can customize the device image by modifying the zIcon configuration property in the device class.
Rack view specification syntax
The specification of a rack view features two required and two optional key-value pairs, which are described in the following table. The value for each key is a positive integer.
| Key | Type | Description |
|---|---|---|
ru |
Required | The lowest rack unit used by the device |
rh |
The height of the device, in rack units | |
st |
Optional | The rack slot |
sc |
The slot capacity (only for chassis devices) |
The syntax of a rack view
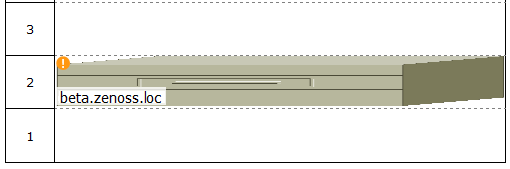
specification is a comma-separated list. The following example specifies
a 1u device in the second rack unit for a device
named beta.zenoss.loc:
ru=2,rh=1
In the preceding example, no rack slot value is included, because there is only one device.