Creating events manually
Manually-created events are useful for testing event mappings, event transforms, and triggers/notifications.
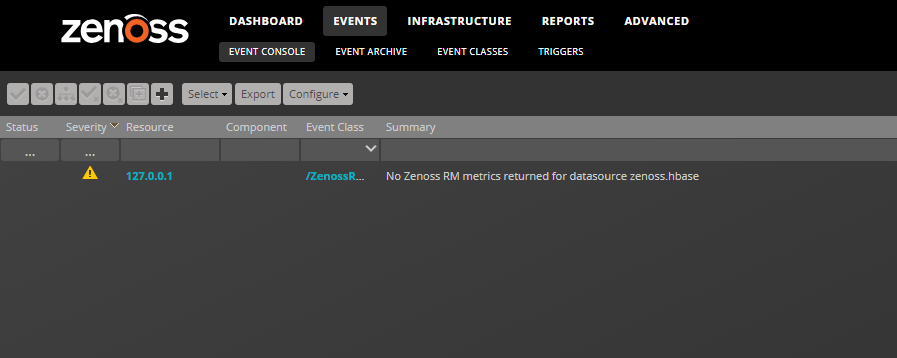
Creating events in the browser interface
Follow these steps:
-
Navigate to EVENTS > EVENT CONSOLE.
-
Click the Add an event icon.
-
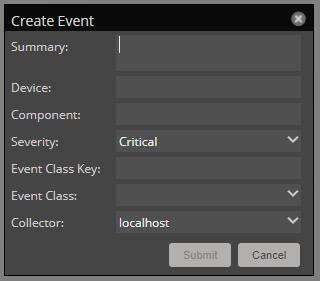
In the Create Event dialog box, add event information.
Field Required? Description Summary Yes A text message describing the event. Device Yes The IP address or hostname of a device; the subject of the event. Component No A device component contained in the subject of the event. Severity Yes The event severity level. Event Class Key No The event class key. Event Class No The event class. Collector Yes The Resource Manager collector that contains the subject of the event (the device). -
Click Submit.
Event class mappings are applied only for events that do not already have an event class.
Creating events with the CLI
To send events from the command line, use the zensendevent command.
Common options include:
-d DEVICE, --device=DEVICE-i IPADDRESS, --ipAddress=IPADDRESS-y EVENTKEY, --eventkey=EVENTKEY-p COMPONENT, --component=COMPONENT-k EVENTCLASSKEY, --eventclasskey=EVENTCLASSKEY-o OTHER, --other=OTHER-s SEVERITY, --severity=SEVERITY-c EVENTCLASS, --eventclass=EVENTCLASS-f INPUT_FILE, --file=INPUT_FILE
Follow these steps:
-
Log in to the Control Center host as a user with
servicedCLI privileges. -
Attach to the zenhub service as the zenoss user.
serviced service attach zenhub su - zenoss -
Run the zensendevent command.
zensendevent Options "Event_Summary_Text"
For example, the following command shows how to simulate a ping down event:
zensendevent -d router1.example.com -s Critical -c /Status/Ping "Router down"